Connect
Ticatag Connect [https://connect.ticatag.com] is a WEB Interface from where you can manage your IOT park, users and organizations.
You can ask Ticatag to turn into organization and you will get extented capabilities to do so.
Devices
List
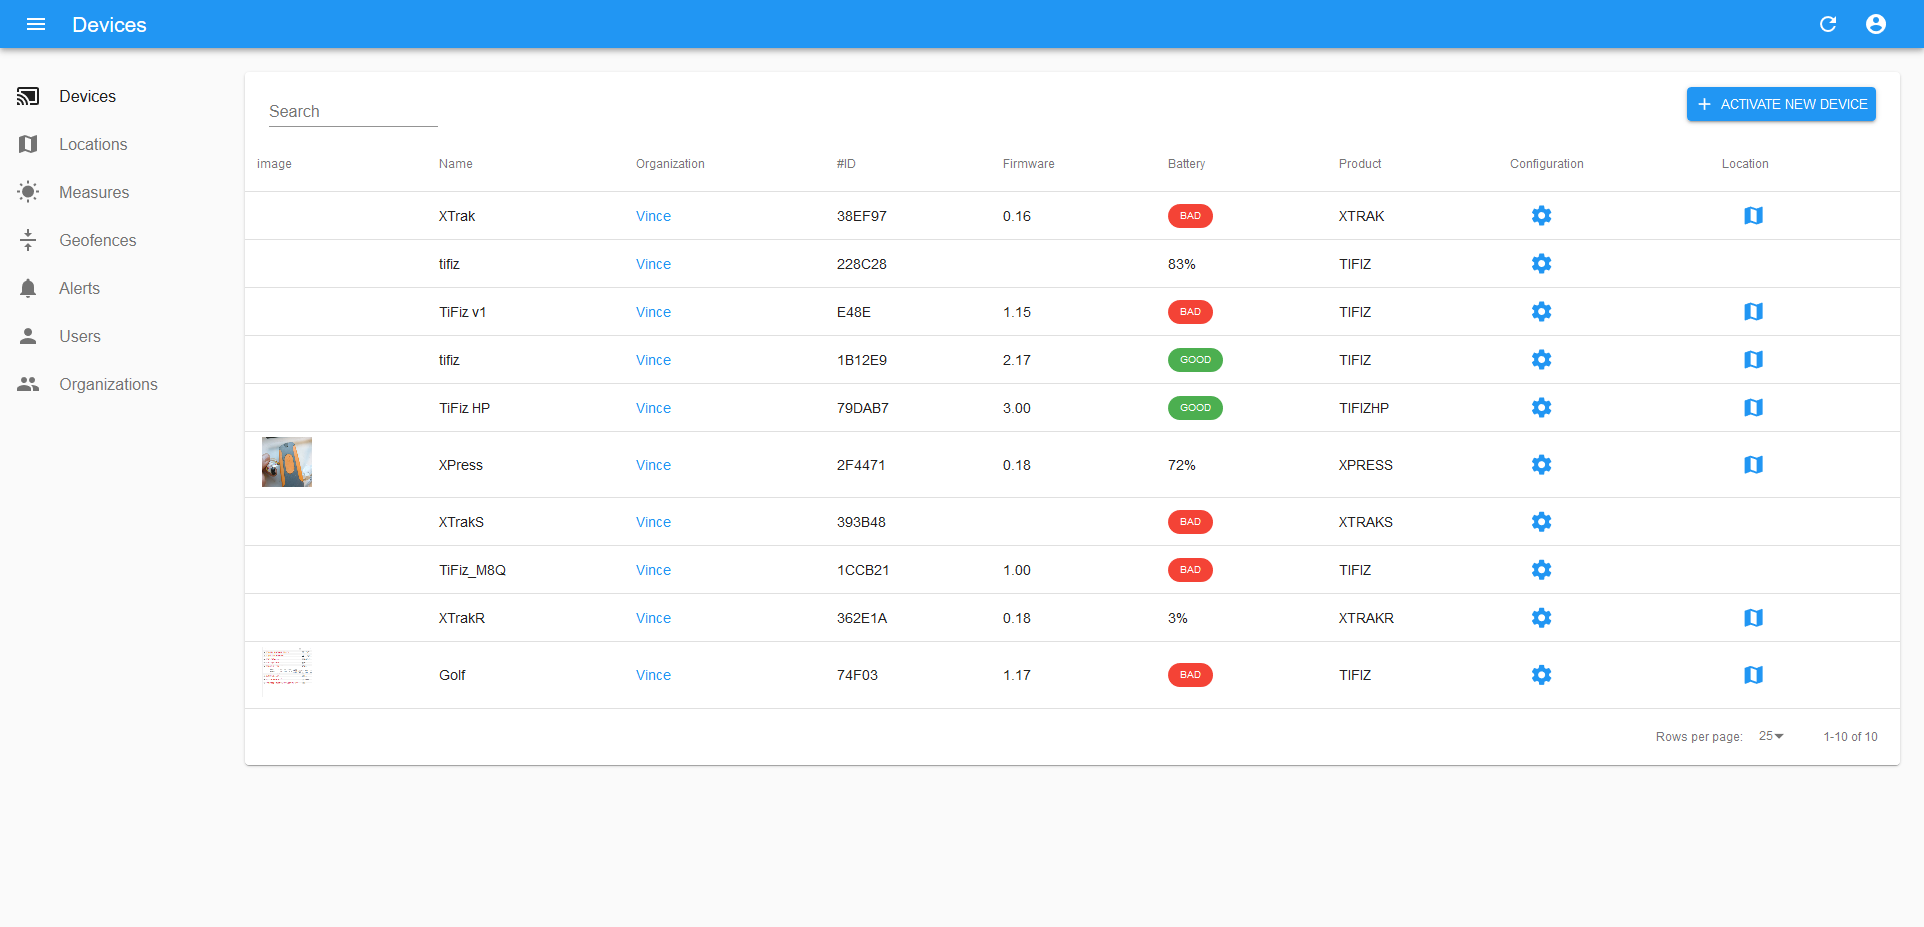
The devices view displays all your IOT park with the following information :
- Image
- Name
- Organization
- #ID : mac address if bluetooth, SIGFOX #ID, Lora DevEUI, etc
- Firmware version (if present)
- Battery level or status (if present)
- Product name
- Configuration link
Above the list, you have a quick search input from where you can filter the list. If you enter an #ID or device name, the list will be filtered accordingly.
Activation
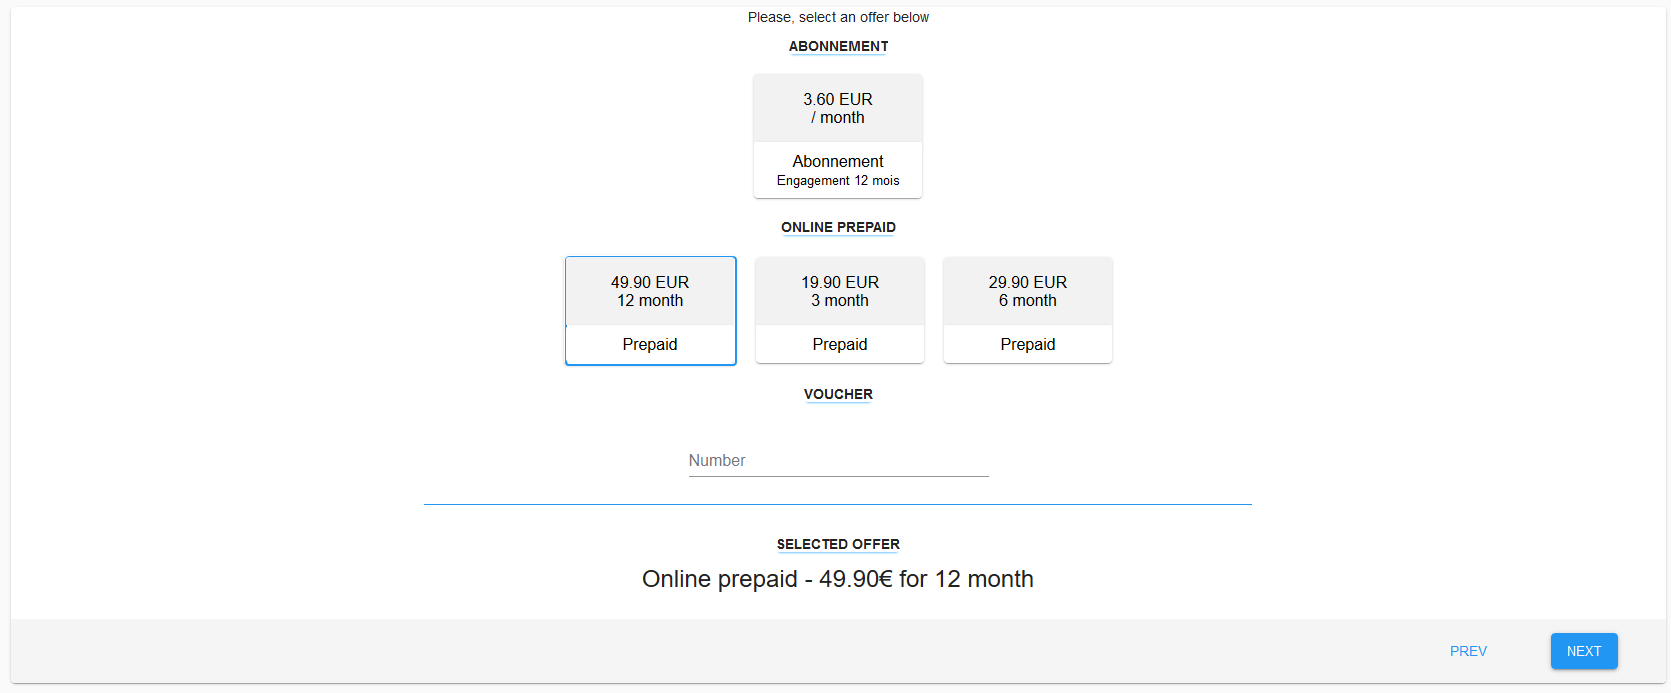
From the list you can activate new device. First you need to enter it #ID (Sigfox or Lora Dev EUI) then you will have to choose a subscription.
Below the type of plans that we propose :
- Postpaid : monthly charge with automatic renewal
- Prepaid : limited duration ; 3, 6 or 12 months
- Voucher : digital or physical card containing a code associated to prepaid plan (3, 6, 12, 24 & 36 months)
The pricing might vary depending on product.
If you are an organization and wish to activate a certain number of devices, you can contact us and we can propose a billing on the whole devices on a quaterly or yearly basis.
As a last step, you need to register a credit card if needed and accept terms and conditions.
Step 1 - Enter #ID

Step 2 - Choose plan
Step 3 - Activate

Configuration
From the list, you can edit, configure or detach the device. The detach process will unassign the owner of the device. The device will remain in the organization.
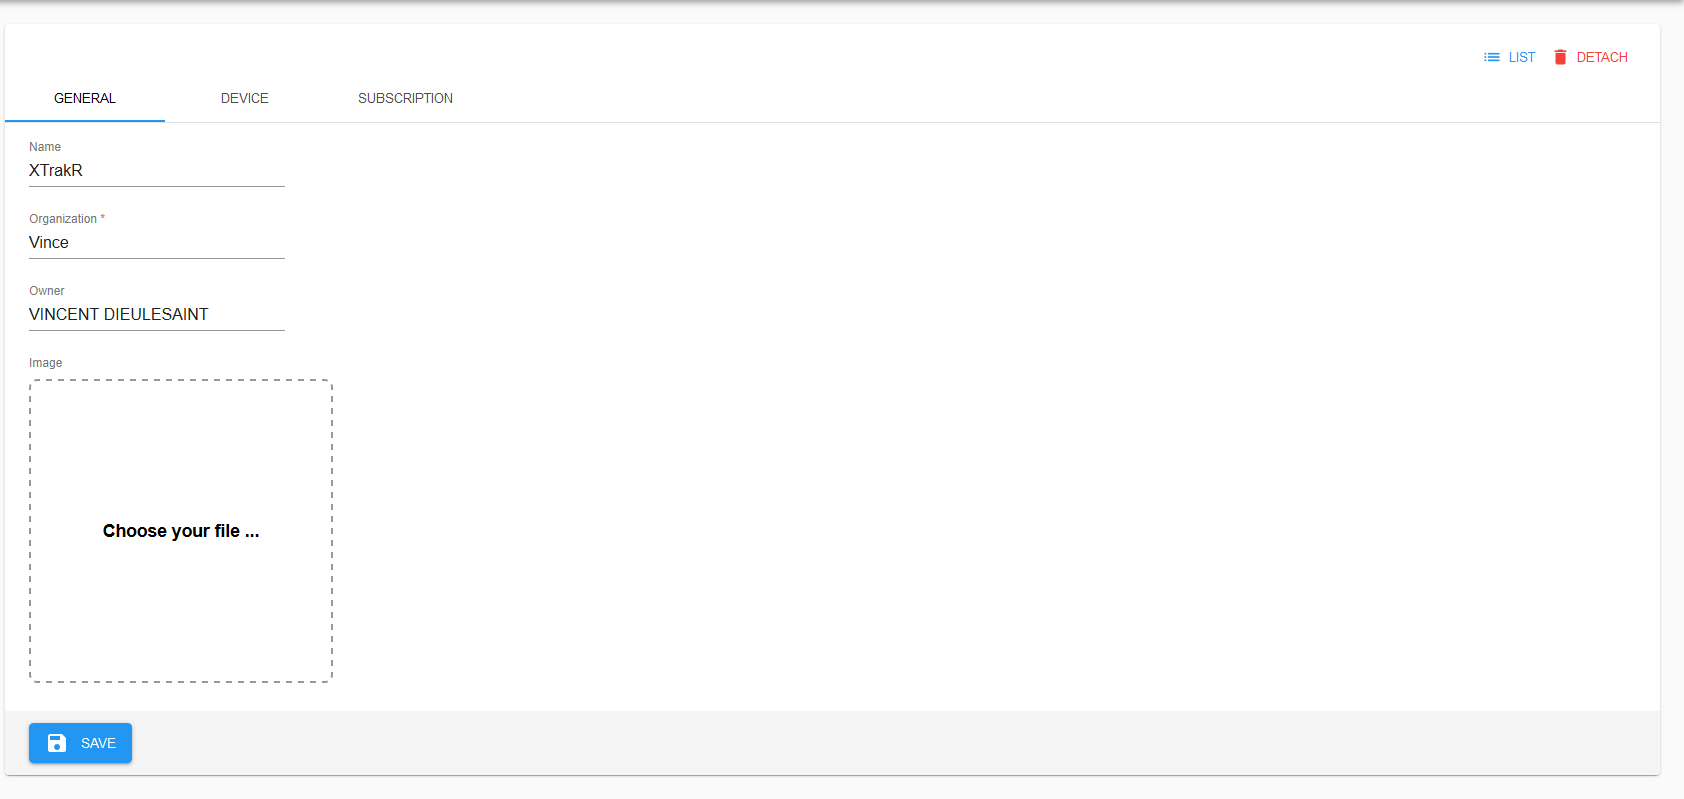
The first tab shows general information that you can edit like :
- Name
- Organization
- Owner
- Image
Additional tabs might be displayed :
- Device : if the device allows remote configuration, the tab "Device" will be present. Depending on product, the parameters that you can modify are not the same
- Subscription : current subscription if the device requires a subscription
Remote configuration aka OTA configuration won't be applied right afterward your changes. Depending on product, it might take up to 24 hours to be applied.
General configuration
Device configuration

Subscription configuration

Locations
Last locations
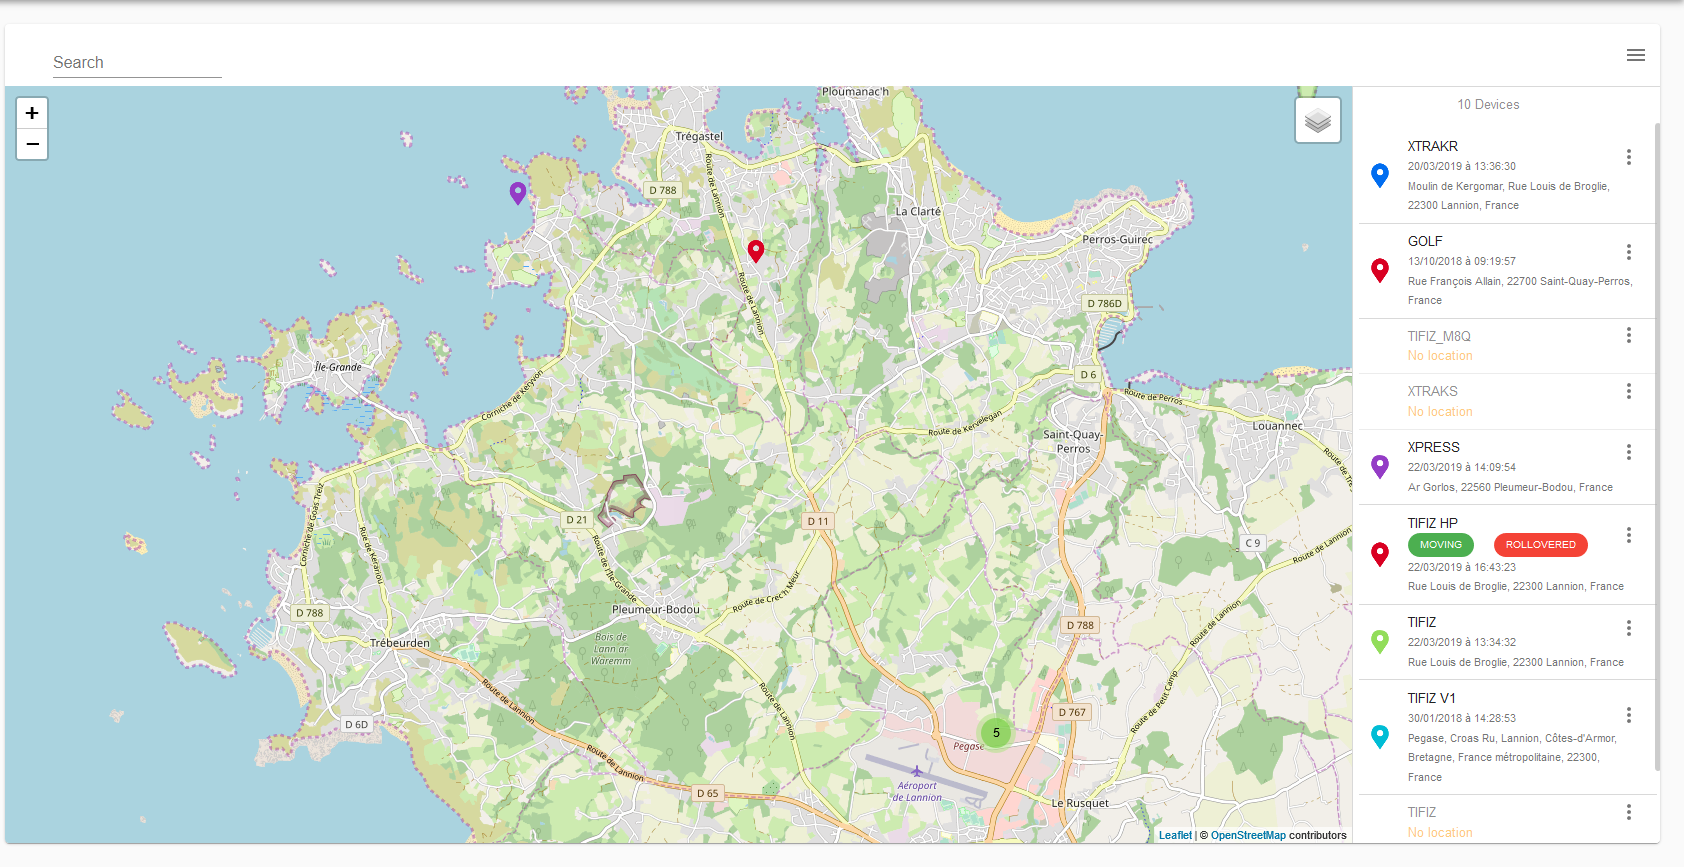
This is the heatmap showing all your devices last locations. From the right menu, you can select a device by clicking on it to display some information like
- Device name
- Device #ID
- Location : timestamp and address
- Latitude and longitude
- Last transmission
From the same menu, you have some actions :
- acknowledge an alert or a rollover
- access the locations history
- customize the marker icon (color and size)
In the toolbar above the map, you have the ablity to :
- filter the devices by typing a name or an #ID
- hide the right menu
Locations history
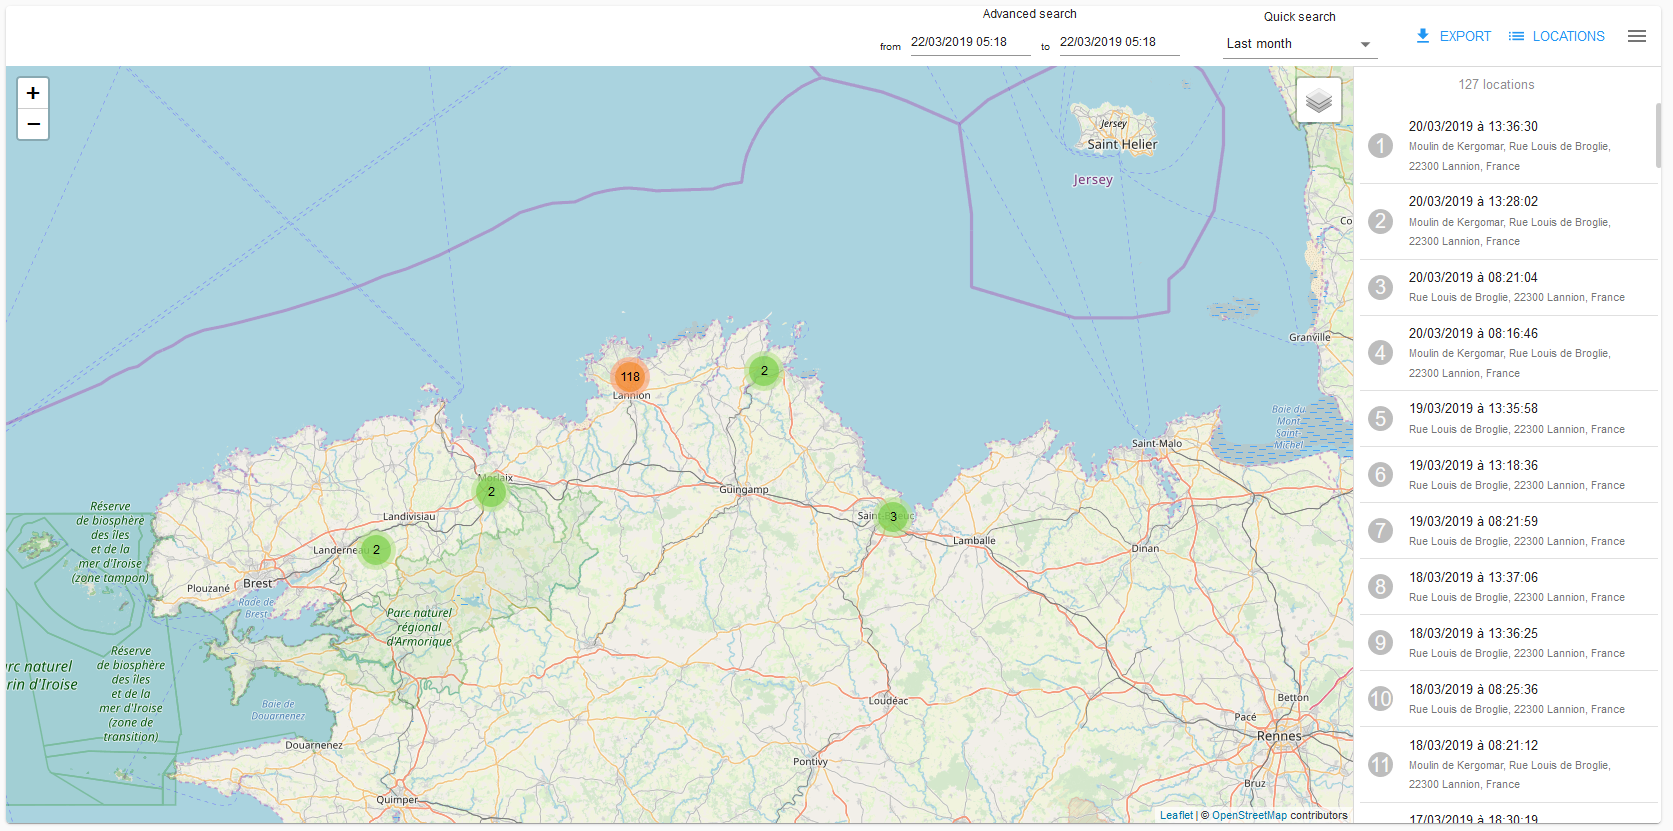
The platform collect and stores the IOT data on a permanent basis. The data are never deleted and you can access to the whole history for locations from here.
By default, the last 25 locations are showed.
From the toolbar above the map, you have the ability to :
- quick search : predefined search criteria like view locations on today, yestarday, last week, last month
- advanced search : search history on a date range
- export your data in JSON, CSV or GPX format.
- locations link that will bring you to heatmap
- hide right menu
Measures
Last measure
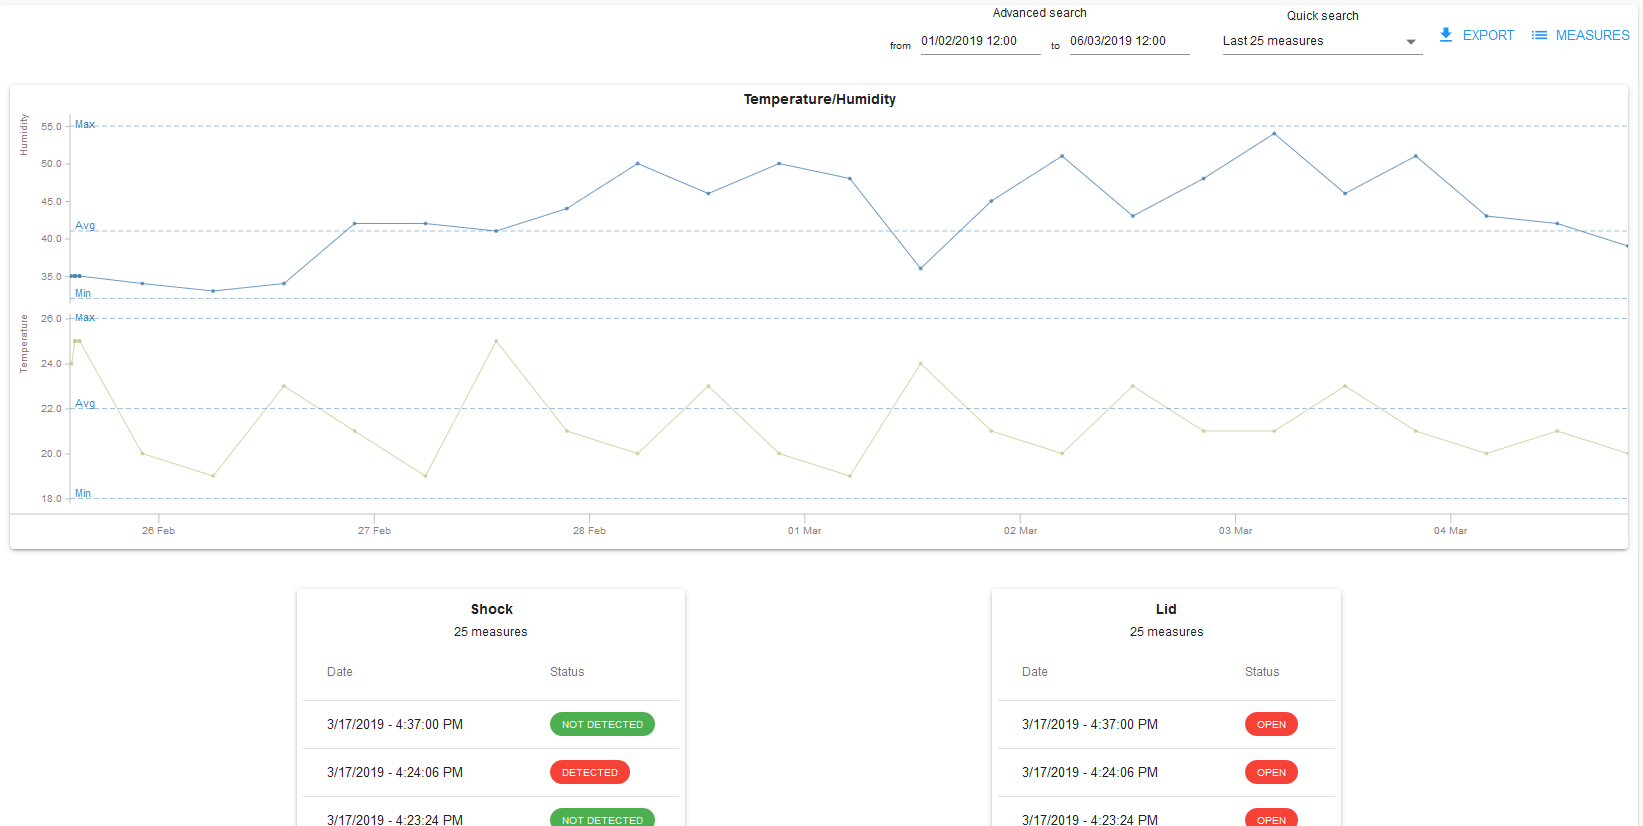
This is the list of telemetry devices. The last telemetry measures (like temperature, humidity, door opening, choc detection) will be displayed here.
From the list, you can access also to the measures history

Last measure history
By default, the last 25 measures are showed.
From the toolbar above the map, you have the ability to :
- quick search : predefined search criteria like view locations on today, yestarday, last week, last month
- advanced search : search history on a date range
- export your data in JSON, CSV format.
- measures link that will bring you to measures list
- hide right menu
Geofences
Geofencing is a virtual boundary around a real-world geographical area. In doing so, the platform can trigger an alert to inform you when your device crossed the zone : both input and/or ouput.
List
The geofences view diplays all your geofences already configured with the following information :
- device name
- address of geofence center
- geofence radius in meter
- active or inactive
Create
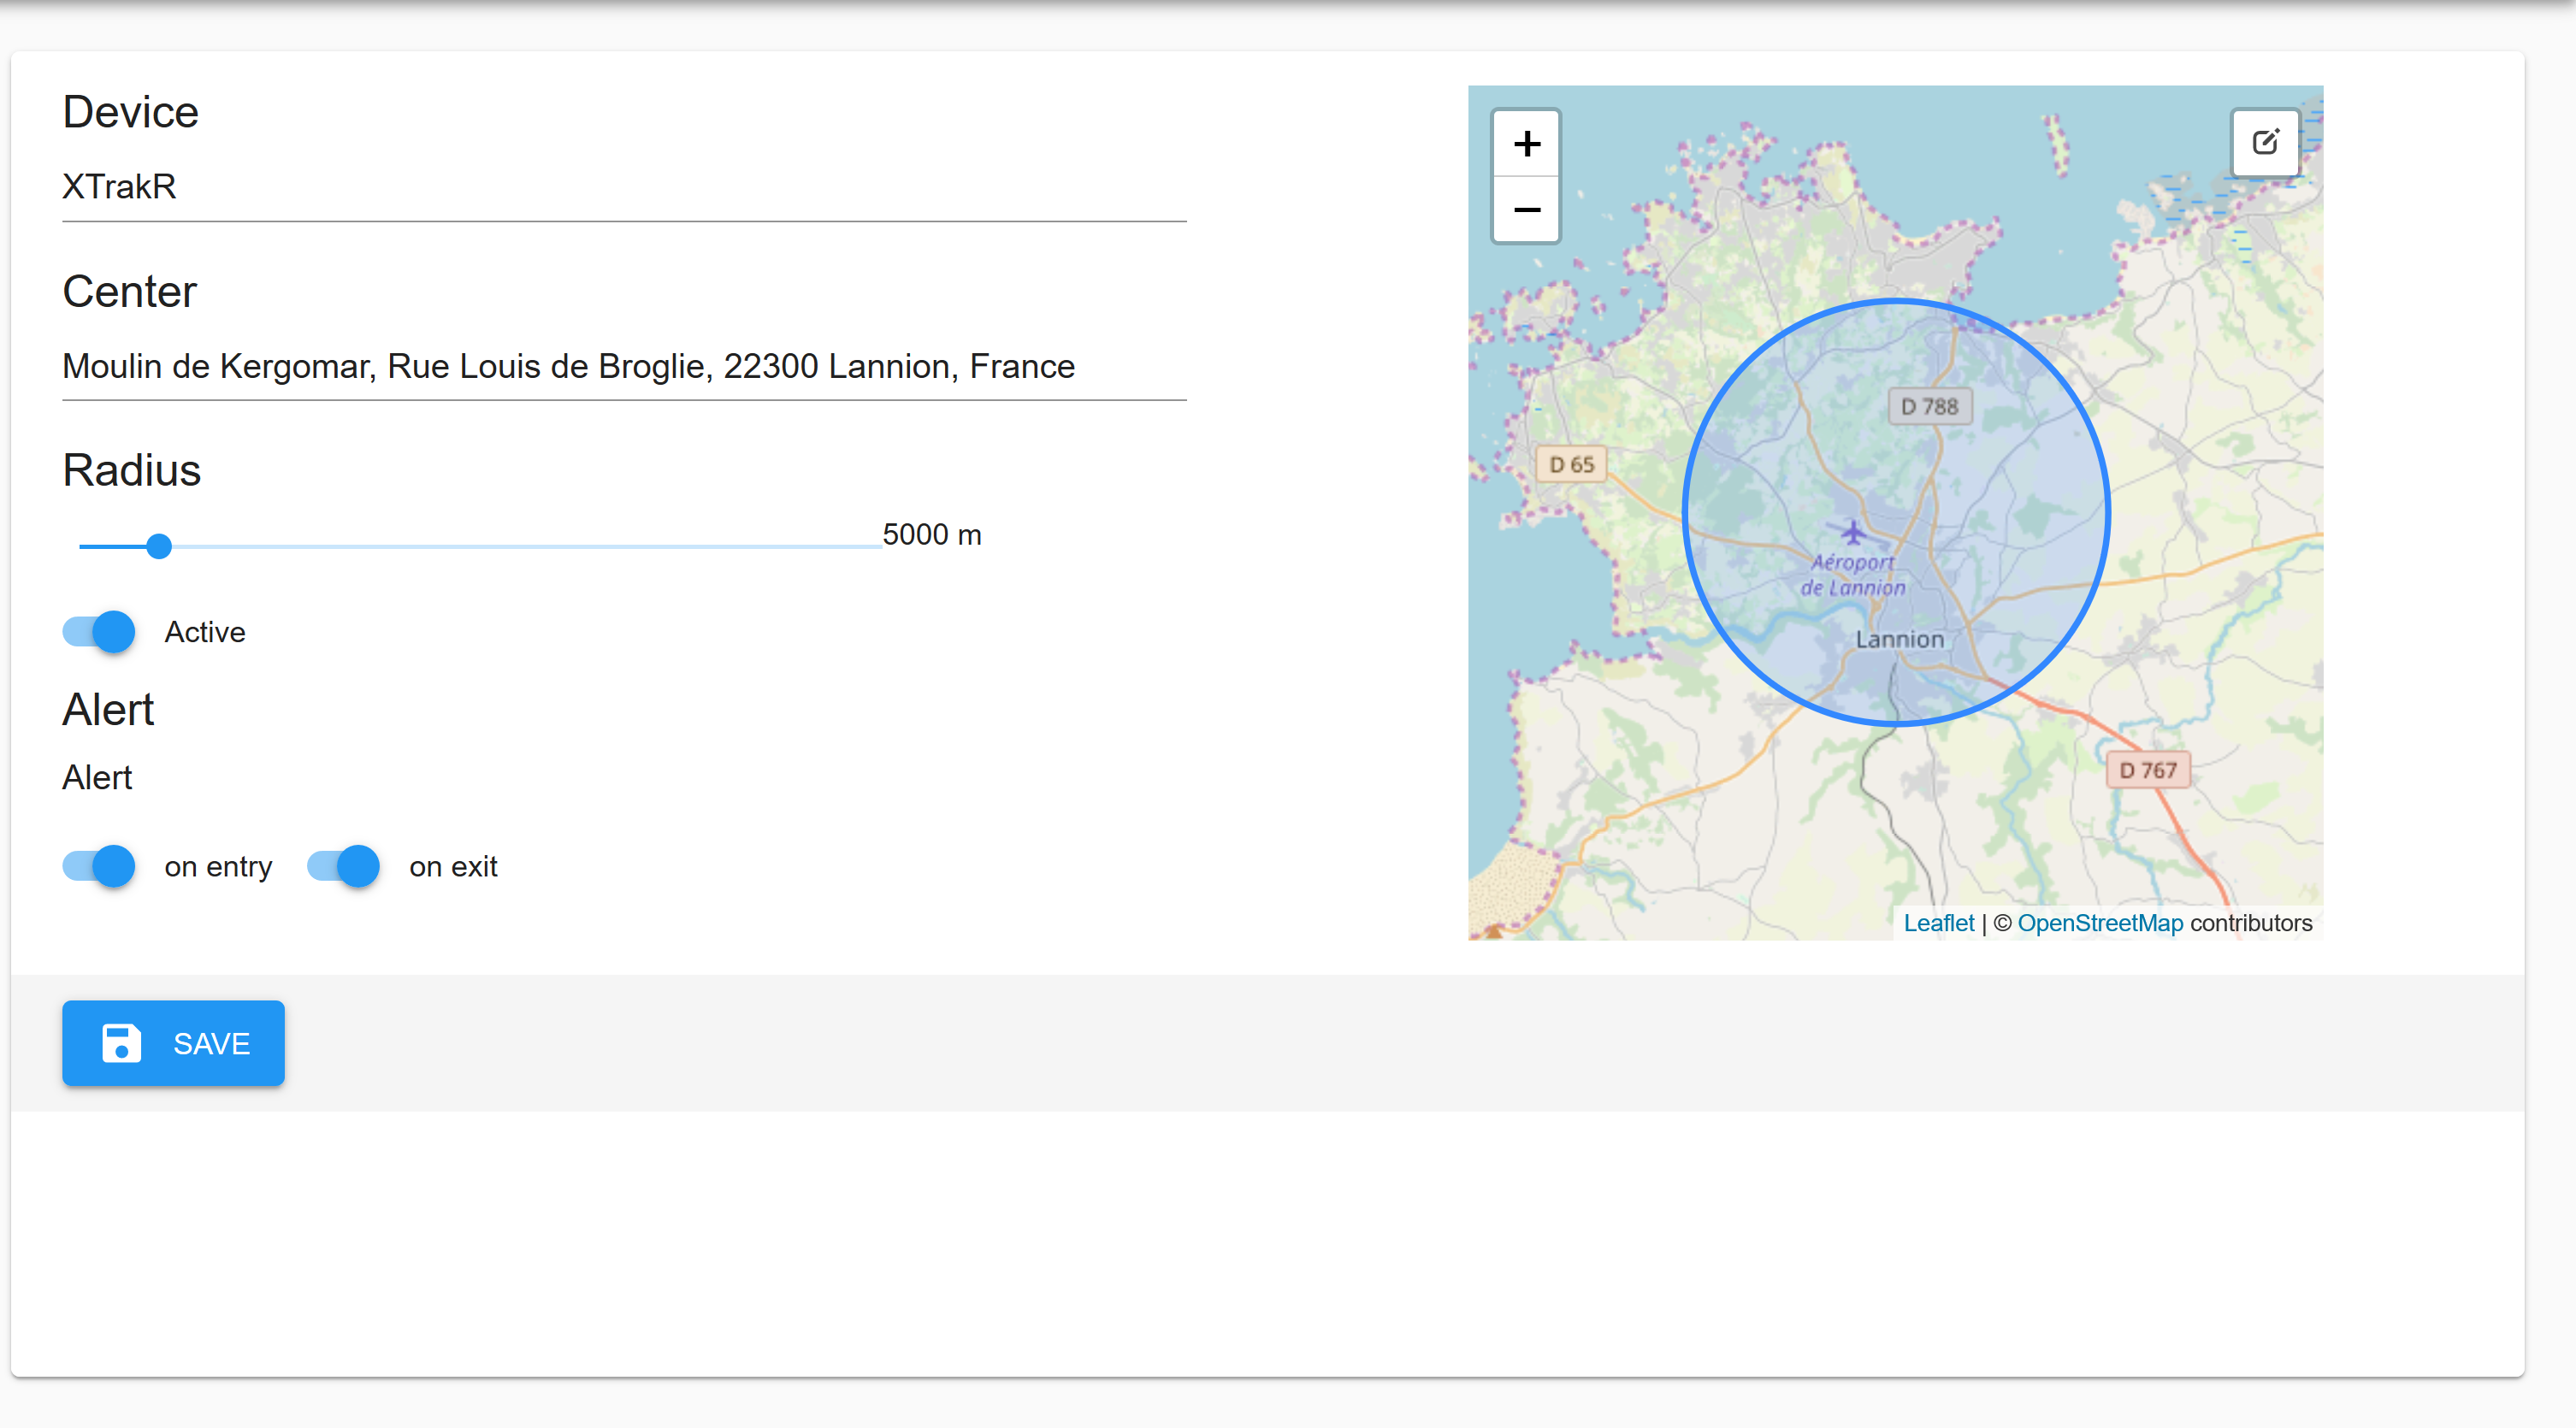
From the list, you can create new geofence. First, you need to select a device by typing the name or #ID of it in the autocomplete input field. Once selected, the center of the geofence will be automatically set to the last location if any. You can change the center of the geofence by typing the address in the corresponding fields or by moving the center of the circle directly on the map : click the edit button then drag and drop. The radius range can be set from 50 meters up to 50 kilometers. Finally, you can choose if you would like to receive the alert on entry or exit. Do not forget to create an alert beside the geofence to receive alert.
Delete
From the list, you can select the geofence that you want to delete then click "delete".
Users
An organization administrator can manage all users belonging to its organization.
List
The list shows you all users belonging to your organization and child organizations. The following information are displayed
- First name and last name (or email if not names not set)
- phone number
- role (admin, member or owner)
- organization
Create
From the list you can add new user to your organization. There are two ways to do so
- Send an invite : the end user you receive an email ; if he has already an account on the platform, he will be transfered once he clicked on the link into the email. If he hasn't signed up yet, he has to go through the sign up process ; the link to sign up is provided in the email.
- Add new user : you will create the account for the end user by entering all the info including password.
Update
From the list, you can click edit and update all user information except email.
Delete
From the list or edit views, you can delete the users. Deleting the user is not hard delete operation, it will just remove the user from the organization. The user account will remain.
Organization
This concept allows you to organize your IOT park and users by groups. An organization administrator can :
- add and manage devices
- add and manage users
- add and manage organization
- invite some users to join as administrator or member
Organization administrator can also create child organization(s) and assign users and devices to them.
Roles and permissions
When you sign up on the platform, the role owner is assigned by default to your user.
If you turn into organization, you will become administrator of the organization and can manage groups of devices and users
| Role | Read | Write | Devices |
|---|---|---|---|
| Administrator | Yes | Yes | All devices belonging to organization and child organizations |
| Member | Yes | No | All devices belonging to organization and child organizations |
| Owner | Yes | Yes | All owned devices |
